Implementing Physical Web using Eddystone
Published:
Hi everyone! This blog post is about a project I did couple of months ago on Physical Web.I will not go deep into the literature and will dive straight into the implementation part.For more information on Physical Web follow this link.
Choosing hardware – Any BLE 4.0+ chip would do.In our project we have used Read Bear Lab’s BLE Shield which incorporates Nrf8001 bluetooth low energy chip.
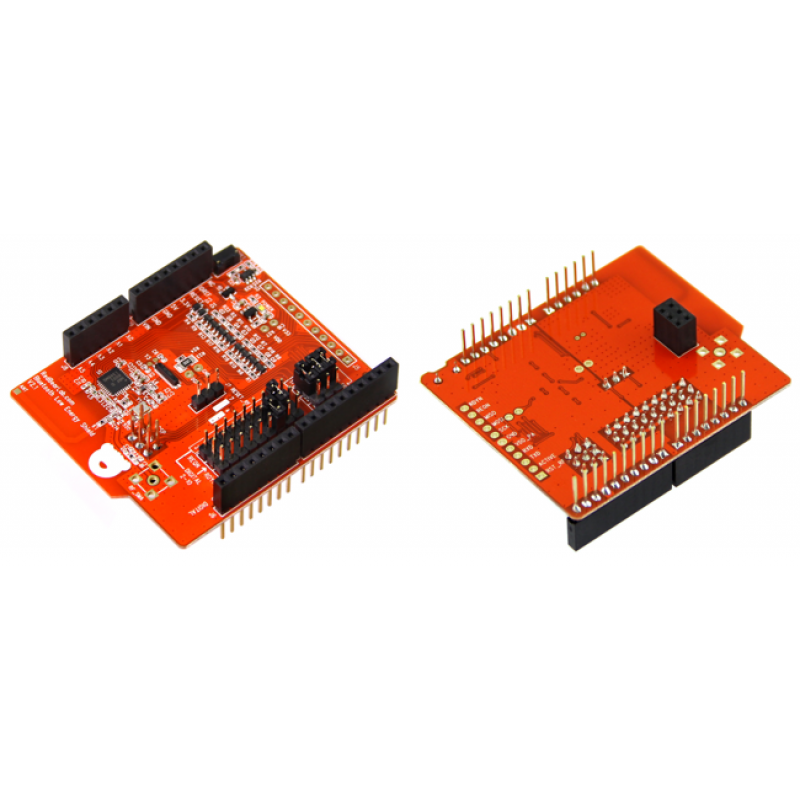
Red Bear Lab BLE Shield
How To Create a Beacon?
Beacons are tiny modules which broadcast radio signals continuously or after regular intervals of time( in our case it is 100 ms).In this project we have used the above mentioned shield and Arduino Mega board to create a beacon.
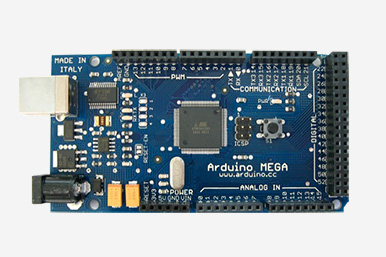
Arduino Mega
Library Used : BLEPeripheral by Sandeep Mistry
This library has number of examples, one of which is Eddystone.h Including this header in our arduino code, we were able to create our arduino + BLE Sheild into a beacon. Ofcourse the practical implementation required us to rewrite basic implementation to suit our own use case.Starting point of this use case was how we broadcast a simple URL. Before going further, note that Eddystone frame format supports three ( now four) frames – URL, UID, TLM.
Eddystone URL:
Eddystone allows for 31 Bytes of data to be transmitted in one frame.So if your URL exceeds 31 Bytes, you can use google shortner to shorten the URL.
- Every Eddystone frame has to have 16 bit Service UUID 0xFEAA which will be used by any scanner application to know that the incoming frame is an eddystone.
- This then will be followed by 1 Byte of frame specific identifier i.e, 0x00 for UID, 0x10 for URL, 0x20 for TLM.
After this follows the actual data.We will be transmitting our URL in this slot.There is a rule by which we encode our URL into the frame.More can be found out here
- Basic code :
// Import libraries (EddystonBeacon depends on SPI)
#include <SPI.h>
#include <EddystoneBeacon.h>

//define pins (varies per shield/board)
// Adafruit Bluefruit LE     10, 2, 9
// Blend                      9, 8, UNUSED
// Blend  Micro               6, 7, 4
// RBL BLE Shield             9, 8, UNUSED

EddystoneBeacon eddystoneBeacon =  EddystoneBeacon(EDDYSTONE_BEACON_REQ,
	EDDYSTONE_BEACON_RDY, EDDYSTONE_BEACON_RST);

void setup() {
	Serial.begin(9600);

	delay(1000);

	eddystoneBeacon.begin(-18, "http://goo.gl/TTY3vU");

	Serial.println(F("Eddystone URL Beacon"));
}

void loop(){
	eddystoneBeacon.loop();
}- EddystoneBeacon eddystoneBeacon = EddystoneBeacon(…) makes an object of the class with three arguments which are the pins.The actual definition inside the library ( EddystoneBeacon.cpp ) looks as follows:
EddystoneBeacon::EddystoneBeacon(unsigned char req, unsigned char rdy,
	unsigned char rst) :
  BLEPeripheral(req, rdy, rst),
  _bleService("feaa"),
  _bleCharacteristic("feab", BLERead | BLEBroadcast, MAX_SERVICE_DATA_SIZE)
{
  this->setAdvertisedServiceUuid(this->_bleService.uuid());

  this->setConnectable(false);

  this->addAttribute(this->_bleService);
  this->addAttribute(this->_bleCharacteristic);
}
There are couple of important things inside this definition.
Services and Characteristics- A call to this constructor initializes our beacon with service and characteristics.Service is a 128 bit data which acts as an identity of the eddystone frame.Next comes the characteristics which can be considered the main elements that give certain properties to your BLE device.You can customize in any which way you want to. Just that at the scanning end you have to already know this data.It acts as a carrier of the information.We can similarly create characteristic for transmission and reception.
SetConnectable is false because initially our beacon is in broadcast only mode
EddystoneBeacon.begin(...)will begin broadcasting the power and URL data.
void EddystoneBeacon::begin(char power, const char* uri) {
  this->_power = power;
  this->setURI(uri);

  BLEPeripheral::begin();

  this->_bleCharacteristic.broadcast();
}EddystoneBeacon.loop()will poll infinitely.
Use Case : Smart Meter
We created a setup which consists of an electronic valve( 230V) , one 5V relay, one Push Button , an LED and the beacon. The idea was to simulate a scenario where a bike driver when in the vicinity of a petrol pump, will get notified on his/her smarphone about it.He/she can then approach the pump, tap on the notification and get redirected to a web-page/web-application which enabled him/her to interact with the petrol pump.Once he sees the webpage, he can pair his phone to the petrol pump( beacon ) and enter the volume of the fluid to be filled in his phone.On sending the command to fill, the beacon recieves it and turns the valve ON till the said amount is filled. At last, this guy can disconnect from the beacon.
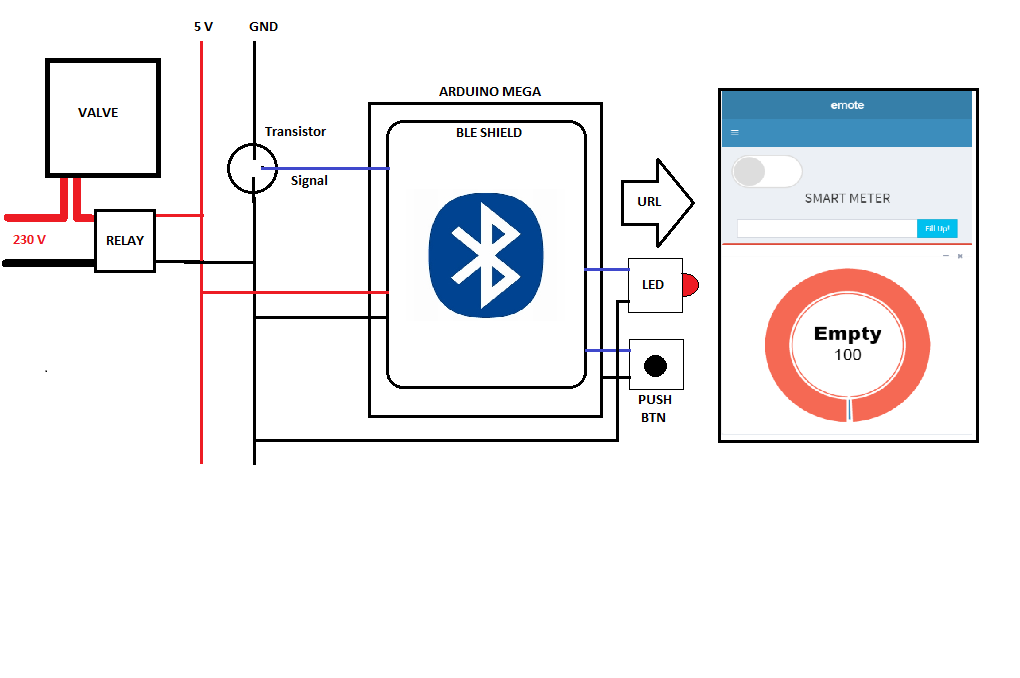
Block Diagram
Web Bluetooth API and the Web Application
To use google’s web bluetooth API, we need to have chrome 49 and above.Since we will be viewing our web application on android phone, one more constraint is that it should be Android 6+. A web application was made on IBM Bluemix with route https://thislinknolongerworks.mybluemix.net. The web application runs a node server at the back end.In the front end, what we see is html consisting of javascript.This is where we write our Web Bluetooth code.
- Requesting the bluetooth adaptor
	  bluetoothDevice = null;
    var writeButton = document.querySelector('#fillUp');
    navigator.bluetooth.requestDevice({ filters: [{ services:
    [ '713d0000-503e-4c75-ba94-3148f18d941e' ] }] })
    .then(device => {
Notice here [{services: […]}] is the serivice number for BLE tx and rx.
- Connect to the GATT Server.This call will return a server object that will be used to connect to BLE Service.
	.then(device => {
        bluetoothDevice = device;
        return bluetoothDevice.connectGATT();
      })
    .then(server => {
        // Getting Service...
        return server.getPrimaryService('713d0000-503e-4c75-ba94-3148f18d941e');
})- After this, the object returned will be used to seperately access the Tx and Rx Characteristics.We will add an eventlistner and handler function to the Tx Characteristic and will send the commands to our beacon using Rx Characteristic.
	.then(service => {
        bleService = service;
        //alert("primaryService passed!");
        // Getting Characteristic...
        return bleService.getCharacteristic('713d0003-503e-4c75-ba94-3148f18d941e');
      })
    .then(characteristic => {
        writeCharacteristic = characteristic;
        return bleService.getCharacteristic('713d0002-503e-4c75-ba94-3148f18d941e');
      })
    .then(characteristic => {
        myCharacteristic = characteristic;
        return myCharacteristic.startNotifications().then(() => {
        myCharacteristic.addEventListener('characteristicvaluechanged',
          handleNotifications);
        });
      })
    .then(() => {
        alert('Ready.');
      })

.catch(error => { alert(error);- Handler Function
	function handleNotifications(event) {
        let value = event.target.value;
        var textDecoder = new TextDecoder();
        //alert(textDecoder.decode(value));
        //document.getElementById("setVolume").value = textDecoder.decode(value);
        var setVal = parseInt(textDecoder.decode(value));
        setVal =(( setVal + 1 ) * 10);
        //DONUT CHART
        var donut = new Morris.Donut({
          element: 'setVolume',
          resize: true,
          colors: ["#3c8dbc", "#f56954"],
          data: [
            {label: "Full%", value: setVal},
            {label: "Empty%", value: 100-setVal}
          ],
          hideHover: 'auto'
        });
}- Writing data to beacon/Sending Commands
  	writeButton.addEventListener('click', function () {
          // Get the bytes for the text
        let input = document.getElementById("inputValue").value;
        let encoder = new TextEncoder("utf-8");
        let text = encoder.encode(input);
        writeCharacteristic.writeValue(text);
    });
Workflow overview:
- Beacon –broadcasts–> URL
- Smartphone Scans for the URL.
- User taps on it.
- Opens a web application.
- User pushes the button on beacon to enter it in read/write mode.
- On web app, user touches toggle button to connect to beacon.
- Pairs it with beacon.
- Enters volume in the text field.Hits Fill Up.
- Beacon is listening to the data.
- Recieves volume related data.
- Goes into a loop and sends integers 0 to 9 at a regular interval decided by the volume related data it just recieved.
- Meanwhile, LED and electronic valve is ON till last integer 9 is sent back to the web application.
- Disconnect.
Check out all the codes here and if you liked the post do follow for future updates!